The end of the season always sneaks up on you.
One minute you’re squeezing in a last ride, the next you’re standing there wondering if you actually did enough before winter shows up. I’ve been on both sides of that feeling, the peace of knowing it’s done right, and the stress of uncovering a jet ski in spring only to find a problem that didn’t need to exist.
Most winter damage doesn’t come from riding hard; it comes from skipping small, boring steps when you’re tired of thinking about the jet ski. This checklist isn’t about perfection or overkill. It’s about making sure spring starts with a key turn and a smile instead of a repair bill.
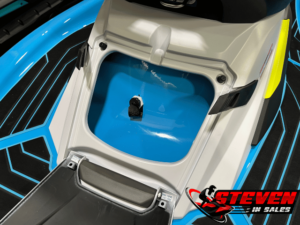
Start With a Bath
This is where I always start, because anything you leave on the jet ski is basically going to sit there and get cozy all winter.
Salt, algae, and grime don’t magically become less harmful when the engine is off and the jet ski is doing nothing. I’ve seen people rush this step and regret it in the spring when fittings are crusty or corroded.
I rinse everything: hull, pump, intake grate, steering nozzle, and any spot water can hide. If you ride saltwater, you need to be extra thorough and flush longer. The goal isn’t just “looks clean”; it’s “nothing nasty left behind to harden or eat away at metal.”
A good bath and a good rinse off with the garden hose are a must before long-term storage like over winter.
Deal With the Fuel
Fuel sitting untouched for months is one of the biggest silent killers of jet skis.
Gasoline goes bad if it sits too long and since jet ski engines are super picky, they’ll let you know you have a problem with a rough idle, check engine light and more.
Before storage, I always treat the fuel with fuel stabilizer and run the engine long enough to circulate it through the system.
I don’t overthink this, but I also don’t skip it. Stabilized fuel is cheap insurance compared to diagnosing fuel problems after winter. If the jet ski is going to sit for a long time, I like to keep the fuel tank nearly empty, as explained here.
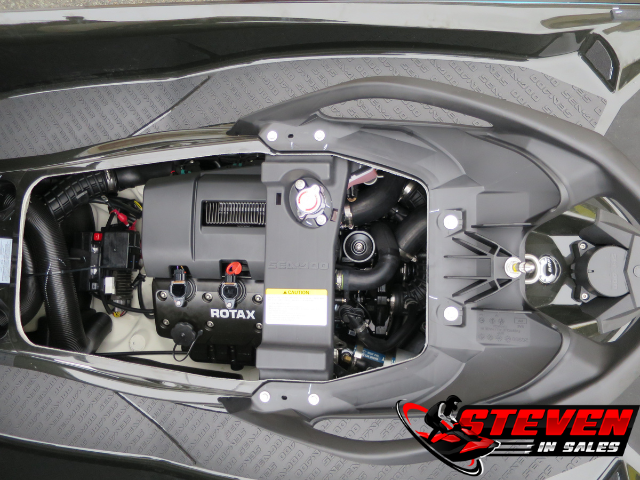
Protect the Engine From Freezing
If there’s one step you absolutely can’t mess up when you winterize a jet ski, it’s this one.
Water expands when it freezes, and engines don’t forgive that mistake. I take my time here because rushing is how people crack exhaust components or cooling lines without realizing it.
I make sure all water is properly displaced or protected before calling it done. Even PWCs stored indoors can freeze if temperatures dip unexpectedly. I’ve seen owners assume “garage storage” was enough… until spring proved otherwise. This is one of those moments where being careful beats being confident.
This is just a checklist, the full steps on how to flush your jet ski for winter are covered in this post here.
Fog What Needs Fogging
Fogging oil isn’t glamorous, but it works.
Internal engine parts don’t like sitting dry for months, especially in humid environments. It’s a good idea to fog your cylinders of your jet ski as shown here.
This is one of those steps where people say, “I skipped it last year and was fine.” Maybe they were, but long-term wear adds up quietly. I treat fogging like brushing my teeth: you don’t skip it because you didn’t get a cavity last time. It’s about prevention, not drama.
Take Care of the Battery
Jet ski batteries hate winter almost as much as engines do.
I remove mine and store it properly instead of letting it slowly die in the hull.
I keep my battery charged and check it occasionally instead of forgetting about it until riding season. This is one of the easiest wins on the list. Five minutes now saves a jump start, replacement, or troubleshooting session later.
Even a solar charger on the battery while still in the jet ski is even easier, as covered here.
Inspect Hoses, Clamps, and Rubber Parts
Rubber doesn’t age gracefully, especially when it goes from hot summer riding to cold winter storage.
I take a few minutes to squeeze hoses, check clamps, and look for cracks or brittleness.
Most problems don’t fail catastrophically; they fail slowly, and winter accelerates that process. If I see something suspicious, I replace it now while I’m already in maintenance mode. It’s easier than dealing with leaks when I should be riding.
Dry It Completely Before Storage
Moisture is sneaky.
I’ve learned that even a “mostly dry” PWC can trap water in places you don’t think about. Before storage, I let everything air out longer than I think it needs.
Don’t throw the cover on just after the wash as the moisture will get trapped and you’ll get mold on your seats and handlebars. Wipe it down with a towel and let it air dry for an hour.
Water will find its way back in unless you completely seal it up with shrink wrap. So make sure you get a cover that is made for your jet ski as they work the best to keep water out. Or get it shrink wrapped for the winter.
Cover and Store It the Smart Way
Where you store your jet ski matters just as much as how you prepped it.
I choose a spot that stays dry, protected, and as temperature-stable as possible.
A garage, carport, or anything covered is ideal. If you don’t have that but are on a trailer, make sure to take the drain plugs out and raise the tongue jack as high as it will go to help with water runoff.
If you keep the jet ski on a slip or hoist on the water, just make sure it’s covered and the drain plugs are removed, too.
It’s important you put the drain plugs back in when you go for a ride next season. Get a zip lock bag and write “DRAIN PLUGS” on it to remind you to put the drain plugs in and keep the jet ski keys in the bag.
Common End-of-Season Mistakes That Cause Spring Problems
Most spring issues don’t come from riding hard, they come from skipping boring steps. I’ve seen people rush winter prep, assume “good enough,” or copy advice that didn’t fit their situation.
The most common mistakes I see:
- Skipping fuel treatment
- Assuming indoor storage means no freezing risk
- Not caring for their battery
- Ignoring small hose or clamp issues
None of these cause instant failure. They just stack the odds against you.
What to Check When You Uncover Your Jet ski in Spring
When spring comes, I don’t just throw the cover off and hit the water. I do a quick inspection first to make sure winter didn’t leave any surprises.
I check:
- Battery condition
- Hoses and fittings
- Fluids check
- Signs of corrosion
- Another cleaning
- Add fresh gas
- Leak test; let it sit not running in the water for a minute and see if the hull is taking on water
This takes a little bit of time and gives me confidence before that first ride. It’s the difference between excitement and anxiety at the launch ramp.
One Last Walk-Around Before You Walk Away
Before I officially call it “done,” I walk around the jet ski one last time. No tools, no checklist, just a calm look.
I ask myself if there’s anything I’d be annoyed about finding in spring. Any repairs I should get done now, because come spring and summer the repair shops will be slammed so it’s better to get it done now while I’m not using it.
If you’ve got any warranty work or a problem that may become a big issue, it’s best to get it done now while things are slow (and often cheaper).