After a thrilling day of riding waves and exploring the open waters on a personal watercraft (PWC), it’s not uncommon to find your prized watercraft covered in a layer of grime and debris.
Despite your best efforts to keep it spotless, PWCs have a knack for accumulating dirt, salt, and residue over time, even after a single day of use!
In this post, we’ll uncover the reasons behind why PWCs get so dirty despite your efforts, exploring the environmental factors, riding conditions, and maintenance challenges that contribute to this inevitable buildup. Additionally, we’ll share tips and techniques to effectively clean and maintain your PWC, ensuring it stays in top condition for countless future adventures on the water.
What Are The Benefits Of A Clean PWC?
It’s always a good idea to keep your machine clean, but why do it in the first place?
One of the biggest reasons is to keep fading down. Your watercraft will fade in the sun, and keeping it clean and waxed will keep the fiberglass from fading away. Fiberglass that is fading is more likely to crack when you hit something or blister when long exposure to water. (Keeping a cover on the PWC helps too!)
The trickiest part is keeping the footwells clean, as water likes to pool there. When water sits in the footwells, the fiberglass will blister and split. The sitting water also attracts bugs like mosquitos and other pests!
Lastly, a clean PWC sells quicker than other ones. Even if you’re not selling your PWC anytime soon, the fading compounds over time. The plastics, spotting on the seats, and overall condition slowly gets worse over time, but keeping your PWC clean and waxed dramatically slows this down.
What Supplies Do You need?
Below is a list of cleaners I suggest you use.
- Simple Green (Amazon Link Ad).
- Boat/marine wash (Amazon Link Ad).
- Vinyl cleaner (Amazon Link Ad).
- Spray wax (Amazon Link Ad).
The supplies you need besides the cleaners are:
- Wash rag.
- Wash bucket.
- Hose.
- Scrub brush.
- Drying cloth.
I prefer using a “wash rag” over a sponge because you can get in tighter spots. Using your finger with the rag or some kind of stick, you can get in tighter spots than a sponge could reach!
Cleaning A PWC
- Chock the wheels of the trailer and raise the nose up, so water can flow out the footwells.
- Thoroughly rinse the unit with the garden hose. This helps knock any loose debris and salt that maybe sticking around.
- Get a bucket and add some boat wash with water.
- Wash it with a fresh rag with the boat wash.
- For filthy areas, like the footwells, spray some Simple Green on it to help loosen up the dirt. Avoid putting simple green on the aluminum trailers.
- Thoroughly rinse off the craft from the soap.
- Using a drying cloth, wipe down the machine, it’s not done until you dry it off.
- Once dry, apply spray wax to protect it from the sun and water.
Cleaning the seats and other soft parts requires more steps that I cover here.
The video below not only shows a Sea-Doo getting washed, but also what to do on after-care riding in saltwater:
Black Dots
Overtime you’ll see black dots on your handlebars, seats and other soft areas. These dots seem like mold, but bleach won’t remove them, so what are they?
The best way to describe these black dots is that they’re like freckles on vinyl. They can be removed, but often, I find it nearly impossible and not worth the effort. It’s just the nature of the beast, and they show up because you don’t keep your machine covered enough.
Here lately, my go-to fix when nothing else works is to use vinyl spray paint. (If a magic eraser doesn’t work) This works very well on white seats and such, but it’s hard on multiple color seats. Another option, and more costly, is to get the soft materials reskinned. Any vinyl shop can do it, and you can make the color and texture whatever you want. There are even companies that sell seat skins and if you have the time and a large stapler you can do it yourself.
Shiny Plastic Parts
Regular non-shiny plastic parts on your PWC are easy to take care of, but if you come across anything that is shiny, glossy, or even worse, “black-gloss“, it’s going to be a battle.
If you wipe down a shiny black trim piece, you will scratch it, it’s that simple. You need to use a microfiber rag that doesn’t have anything in it. Even then, you’ll get micro-scratches.
If it doesn’t bother you, then you can leave it, as those scratches don’t affect anything on the trim and are only visible when the right light is shined on it. If the scratches got to go, then this video will show you the way to fix it. Just know, it’s an uphill battle to keep the scratches from coming back, just looking at glossy-black trim wrong will scratch it. Even putting your cover on will scratch them. My best advice is to paint them flat or avoid watercraft with glossy-black trim.
Removing Water Spots?
After washing, you may notice some water spots even after drying.
Those spots are easy to remove with a water spot remover or cleaner-wax and a microfiber rag.
Avoid cleaner-wax on plastic parts, use a plastic cleaner instead. (See this video)
Cleaning The Engine Compartment
To wash the engine compartment is different from the rest of your PWC. Here are the steps I take to wash the engine area.
- Remove drain plugs.
- Lift the nose up, so water will drain out the drain plugs.
- Remove the seats.
- With the mist setting on your garden hose sprayer, lightly spray down the engine compartment.
- Spray Simple Green on the engine and around the engine, let it sit 5 minutes.
- Gently rinse off the engine compartment of the Simple Green.
- Leave the seats off to air dry an hour.
It’s important you let the engine compartment dry out before putting the seats back on. It doesn’t need to be perfect, just not soaking wet!!!
Should You rinse The Jet Pump?
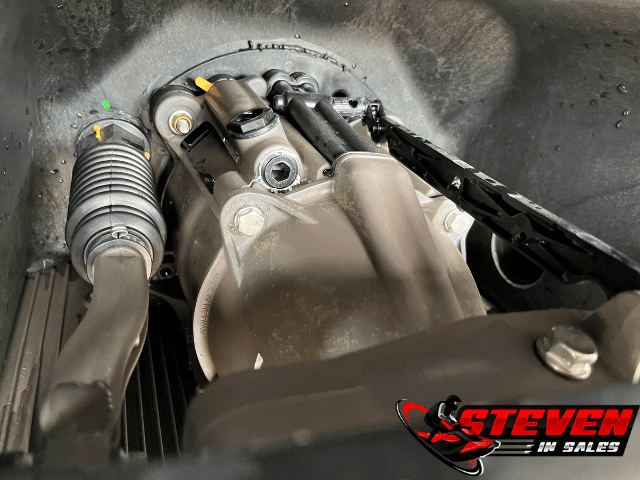
Don’t forget to rinse the jet pump, as it takes the most abuse, especially if you ride in saltwater.
- Thoroughly wet the jet pump area with lots of water.
- Use Salt-Away Sprayer (Amazon Link Ad) and coat the pump.
- Let it sit a few minutes and then rinse it off.
- Let the jet pump dry out an hour.
- Spray anything metal and shiny with a silicone spray lube.
Washing The Bottom Of The Hull
To clean-up the bottom of the hull requires more effort and more tools.
I suggest you use a pressure washer, Simple Green, and a long handle scrub brush.
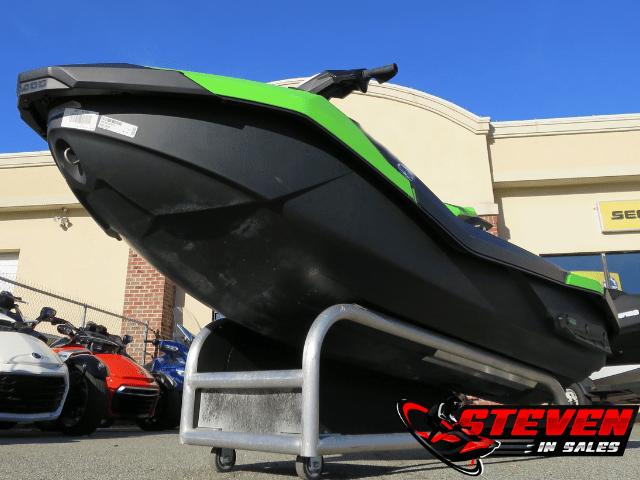
- Get the watercraft tilted back on the trailer, so you can reach the underside. If you can, put the watercraft on a stand, as it makes it easier, no need to tilt if on a stand.
- Using the pressure washer, try to remove as much of the grime as you can. Avoid going too hard with the pressure washer as you can damage the fiberglass or plastic.
- Spray Simple Green on the rest of the grime that is left and let it sit a few minutes.
- Use the long handle scrub brush to work it in and loosen up the grime.
- Pressure wash the underside of the hull again to remove any grime that was left.
What If Simple Green does not lift the grime off? Then you need to get a boat bottom cleaner (Amazon Link Ad).
Important: Wear eye, face protection and clothing you don’t mind getting stained!


Thank you for all your information, much appreciated.
Commenting because I see you’re regularly answering. I have some sort of build up, looks like maybe from the cover when I’m trailering it to the water. But I’ve used simple green on it and I can’t get the stuff to budge. I’m sure no one else sees it but I do. It’s a sort of whiteish color, almost how a water spot looks but I hammered away on it with enough elbow grease that I had to take a break. Any ideas? I have a 2020 Wake Pro 230.
A 2020 model? I would talk to your dealer as you might not be the only one seeing this problem and could be a factory defect.
What is best to clean the black matte bottoms of the 2020 Sea Doos?
I usually use a pressure washer and simple green.
We are looking to figure out how to clean the traction pads on our jetskis. We just recently waxed the skis so a little of the residue ended up on the pads and we just want to make them look cleaner. Thanks for any tips!
Depending on the mats I’ve used soft scrub with a brush or simple green with a brush. The wax will put up a fight so it will require a lot of elbow grease.
The 2019 Sparks are polytec. Are these products ok for them also?
Yes, I’ve used the products in this article for years on my 2014 Sea-Doo Spark and had no issues.
Do i need to wash a spark inside the engine?
You only wash the engine compartment if you ride in salt water.
Any recommendations to keep the Black Sea Doos clean? Looking at a 2016 GTR 215 and really concerned it’s going to show everything and never be clean. Will be storing it on a lift at the lake. Thanks
Just make sure to use spray wax or keep them covered more often so they don’t fade as quickly. Surprisingly the black Sea-Doo are not the biggest issue, it was the red ones that faded the quickest and showed dirt the most.
I just bought a new gtx 300 limited. Putting it in the water for the season on this Friday. It’s salt water. Should I put some wax on it and anti corrosion spray on the engine before it even goes in the water for the first time? It will stay on a floating dock for the whole summer so I’m thinking I should give it a good layer of protection before hand. What is your thought? Thanks and I love your articles. Super helpful.
Honestly, I wouldn’t on these new ones unless you’re doing winter storage. They already come from the factory with anti-corrosion on them and have many other anti-corrosion measures in place that it would be overkill. The best thing you can do is wipe the seats dry and then place the cover on it when you’re not riding it.
Oh okay. Perfect. I don’t ride in salt water. Live in WI lol
Do I need to put on an anti corrosive spray?
Only if you ride in salt water. Just spray everything that looks electrical with anti-corrosion spray (they make marine versions that you can get at WestMarine or online).
Just bought like a month ago a 2018 sea doo gti se
And I love it but I wanna keep it clean and stuff. Thank you for all of your posts! Your the reason I bought a gti lol
These are 2 products that I use everyday for my lawn equipment and vehicles. I’m glad I came across your write up and I thank you for giving these simple instructions on how to clean. I’m curious how I avoid using simple green on Aluminum since my 06 Seadoo GTX is an aluminum engine… Like other metals on the ski. I have seen that is creates an off finish when it comes in contact with. Thanks for taking the time to do this and provide the “so easy a caveman can do it” steps! -Bryan in Texas
Simple green will only stain bare aluminum. I’ve used it on Seadoo Engines without any issues. In the post, I’m more worried about getting simple green on an aluminum trailer as the stains will show up on that. Make sure to dilute the simple green and don’t let it sit for too long.